Contents
Setup IDE
If you haven't already done so, the first thing you will need to do is to download the Arduino IDE, install it, set it up and learn a couple of important basics.
Download and install the IDE
The IDE can be downloaded from Arduino.cc. This will open in a new window or tab.
The download options appear in a green box near the top of the page. The installation is pretty straight forward. If you get stuck, there is a "Getting Started" link on the downloads page which will guide you through the installation process.
Setup the IDE
Once you have downloaded and installed the IDE, there are a couple of configuration options that are useful to check.
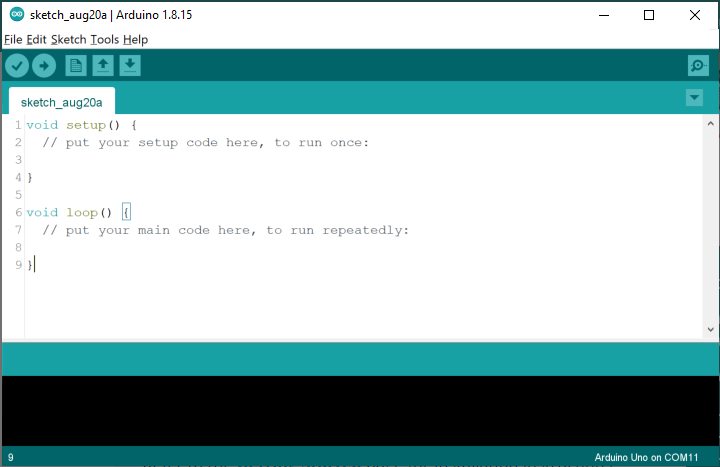
Run the IDE, you should see a window that looks a bit like this:
Open the File menu and select Preferences to open the following dialog:
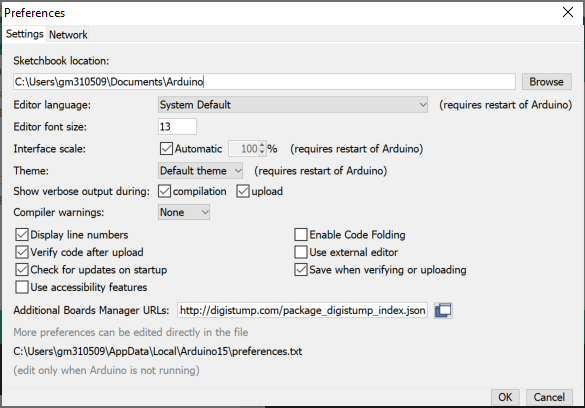
Ensure that "Display Line Numbers" and "Check for updates on startup"
are both checked. Some of the other settings may differ from mine.
If so, that is OK for now.
Click on OK to close the Preferences dialog.
IDE Basics
Whenever you are using the IDE, you must ensure that the following two items are set correctly:
- The type of board you are working on - for example, Uno, Mega, Micro etc.
- The Port that the board is connected to.
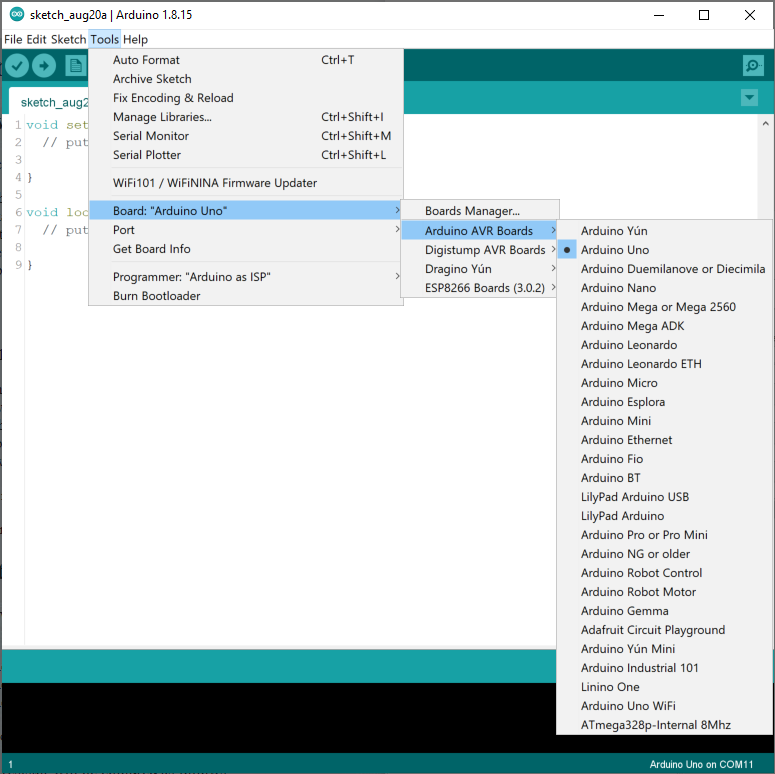
To set the type of board, simply select the "Tools" menu, then "Board"
and finally "Arduino AVR Boards".
Select the board (e.g. Arduino Uno or Arduino Mega etc) from the list
of available boards.
This is shown in the following screen shot. Note that I have "
Arduino Uno" as my board selection.
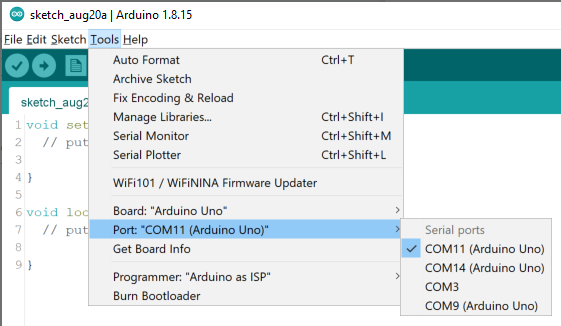
The next step is to tell the IDE where this board is connected.
By where, I mean identify the device device name that Windows (MacOS or
Linux) has assigned to your Arduino board.
This is done by a "differential" process. Basically, you look at the
list of ports known to the system before you connect
your Arduino to your computer. Then, connect your Arduino and look at
the list of boards known to the computer.
The new entry in the list is the board you are looking for.
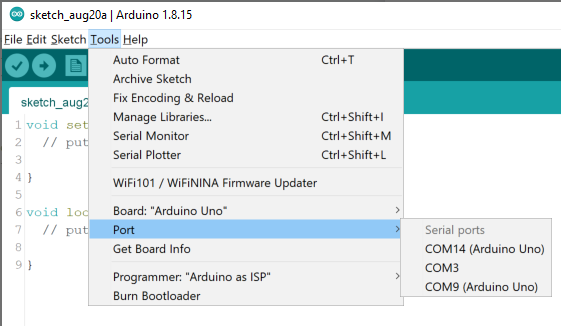
In the following diagram, note that COM11 has appeared in the list
of available ports in the "after" image.
| Before connecting Arduino | After connecting Arduino |
|---|---|
 |
 |
If your port did not appear after connecting your Arduino, be sure to close the tools menu fully before reopening it. The port menu will not be refreshed with the new ports while it is open.
At this point your IDE should be setup and ready to go.